 Pin This
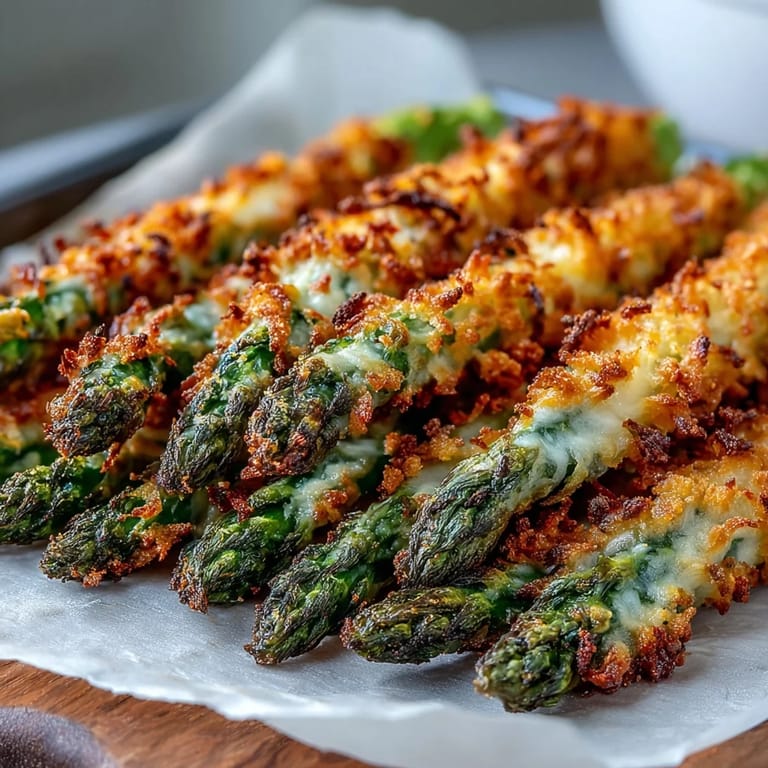
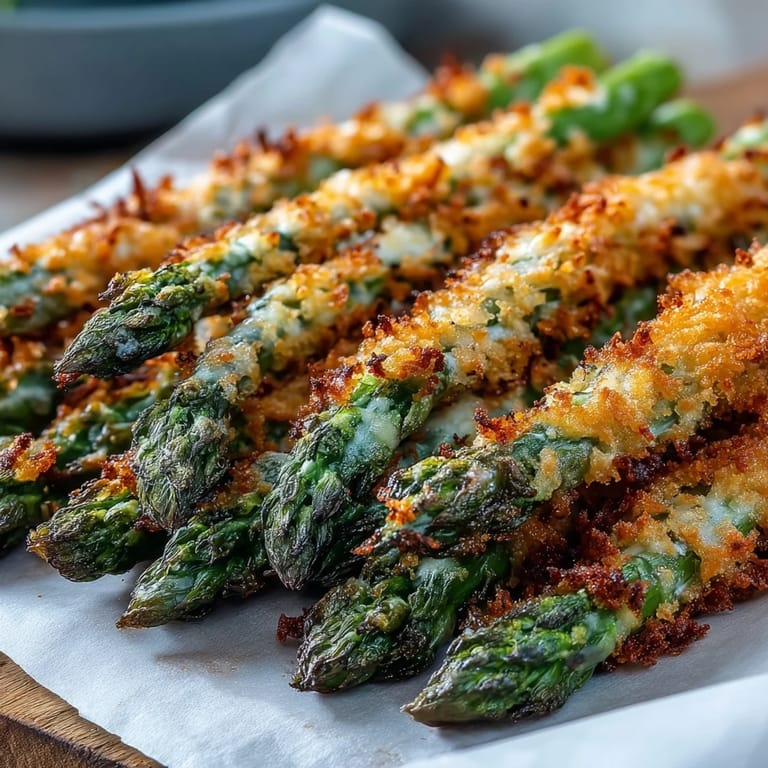
 One spring evening, I decided to experiment with asparagus instead of the usual zucchini sticks, and the result stopped everyone mid-conversation. The panko coating turned impossibly golden and shattered under the slightest bite, while the asparagus inside stayed tender and sweet. My neighbor reached for a third spear before I even plated the rest, mumbling something about needing the recipe immediately. That night, this dish went from kitchen experiment to requested favorite.
I first served these at a casual backyard gathering where I needed something elegant but not fussy. Watching people stand around the platter, dipping and laughing, made me realize how good food creates those unplanned moments of connection. Someone asked if I trained in a restaurant kitchen, which made me laugh because I was winging it with what was in my fridge. The empty tray at the end told me everything I needed to know.
Ingredients
- Asparagus: Choose medium to thick spears because they hold up better to coating and baking without turning limp, and their meatier texture contrasts beautifully with the crispy crust.
- All-Purpose Flour: This creates the dry base layer that helps the egg mixture cling, ensuring your coating does not slide off during baking.
- Egg and Milk: Whisking these together makes a smooth binder that glues the panko mixture to each spear evenly and tightly.
- Panko Breadcrumbs: Their larger, airier flakes crisp up far better than regular breadcrumbs, giving you that restaurant-quality crunch.
- Asiago Cheese: Its nutty, slightly sharp flavor melts into the coating and adds savory depth that plain breadcrumbs just cannot match.
- Parmesan Cheese: Optional but recommended, it boosts the umami and helps the crust turn a deeper golden brown.
- Garlic Powder: Delivers consistent garlicky flavor without the risk of burning fresh garlic under high heat.
- Onion Powder: Adds a subtle sweetness and rounds out the savory notes in the coating.
- Smoked Paprika: This is the secret ingredient that gives a gentle smokiness and makes people ask what that amazing flavor is.
- Black Pepper and Sea Salt: Essential for balancing the richness and bringing all the flavors into focus.
- Olive Oil: A light drizzle before baking encourages even browning and maximum crispiness on all sides.
- Lemon Wedges: A bright squeeze cuts through the richness and wakes up every bite.
- Fresh Parsley or Chives: A sprinkle at the end adds color and a hint of freshness that makes the dish feel complete.
Tired of Takeout? 🥡
Get 10 meals you can make faster than delivery arrives. Seriously.
One email. No spam. Unsubscribe anytime.
Instructions
- Preheat and Prep Your Pan:
- Set your oven to 425 degrees F and line a baking sheet with parchment, then drizzle with a tablespoon of olive oil. This creates a non-stick surface and helps the bottoms crisp up beautifully.
- Trim the Asparagus:
- Rinse the spears and pat them completely dry, then snap off the woody ends where they naturally break. Drying them well prevents soggy breading.
- Set Up Your Breading Station:
- Arrange three shallow bowls: flour in the first, whisked egg and milk in the second, and the panko mixture combined with cheeses and spices in the third. This assembly line makes coating quick and tidy.
- Coat Each Spear:
- Dredge asparagus in flour, shake off excess, dip in egg wash, then press into the panko mixture until fully covered. Gentle pressure helps the crumbs stick without clumping.
- Arrange on the Baking Sheet:
- Lay coated spears in a single layer with space between each so air circulates and they crisp evenly. Crowding leads to steaming instead of crisping.
- Oil and Turn:
- Drizzle the remaining olive oil over the spears or spray lightly, then roll them gently to coat all sides. This step is key to achieving that all-over golden crunch.
- Bake Until Golden:
- Place the sheet on the middle rack and bake for 10 to 14 minutes, flipping halfway through, until the coating turns crisp and golden and the asparagus is tender. Adjust time based on spear thickness.
- Optional Broil:
- For an extra-crispy finish, broil for 1 to 2 minutes at the end, watching closely to avoid burning. This deepens the color and adds a satisfying crackle.
- Finish and Garnish:
- Remove from the oven and immediately sprinkle with the reserved Asiago, then add fresh herbs and a pinch of red pepper flakes if you like. Serve hot with lemon wedges and your favorite dipping sauce.
 Pin This
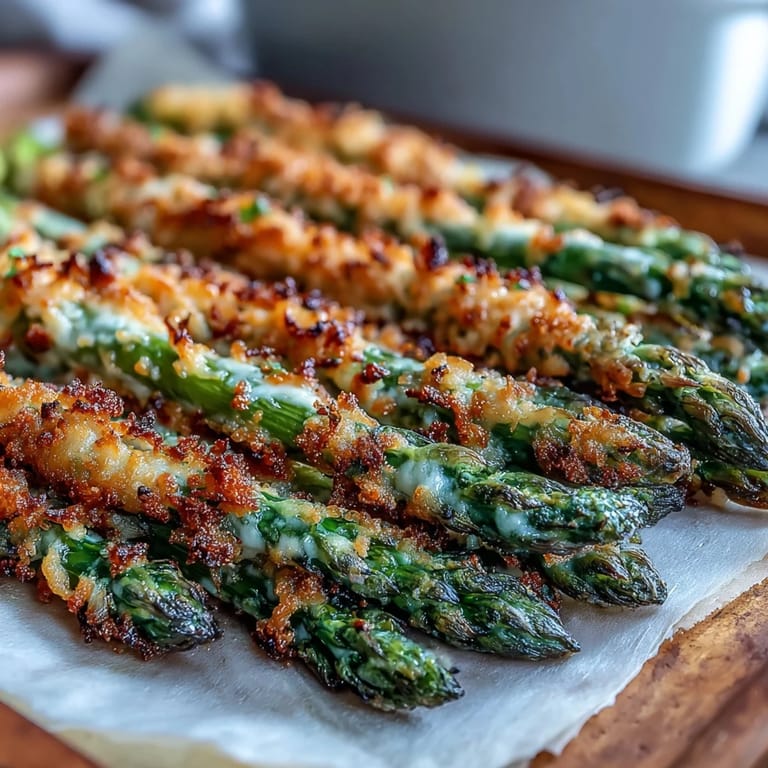
 The first time I brought these to a potluck, someone asked if they could take the leftovers home, which never happens with vegetables. Watching people reach for seconds and thirds reminded me that simple ingredients, when treated right, can steal the show. It became my go-to whenever I wanted to impress without stress.
Choosing the Best Asparagus
Thick spears work best here because they stay firm and juicy inside while the coating crisps up, whereas thin spears can overcook and turn stringy before the breading sets. Look for tight, closed tips and smooth, vibrant stalks without wrinkles or sliminess. I usually snap one spear to test: if it breaks cleanly with a satisfying crack, the whole bunch is fresh. Store them upright in a jar with a little water in the fridge, covered loosely with a bag, and they will stay crisp for days.
Make-Ahead and Storage Tips
You can coat the asparagus up to four hours ahead, arrange them on the baking sheet, cover with plastic wrap, and refrigerate until you are ready to bake. This trick saved me during a dinner party when I needed the oven free for other dishes. Baked leftovers can be stored in an airtight container in the fridge for up to two days, though the coating softens. To revive them, reheat in a 400-degree oven for about five minutes until they crisp up again.
Serving Suggestions and Variations
These spears shine as an appetizer with a creamy lemon-garlic aioli or tangy marinara for dipping, but they also work beautifully as a side dish alongside roasted chicken or grilled salmon. For a lighter version, try baking them on a wire rack set over the baking sheet so air circulates all around. If you want to experiment, swap the Asiago for Gruyere or add a teaspoon of lemon zest to the panko mixture for extra brightness.
- Serve with a simple arugula salad dressed in lemon vinaigrette for a complete light meal.
- Try the air fryer method at 390 degrees F for 7 to 10 minutes if you want even crispier results with less oil.
- For a spicy kick, mix a pinch of cayenne into the breadcrumb mixture or serve with a sriracha mayo dip.
 Pin This
 Every time I make these, someone ends up standing by the oven, waiting for the timer to go off. There is something magical about the way that golden crust shatters under your teeth, revealing tender asparagus inside, and I hope it becomes a favorite in your kitchen too.
Recipe FAQs
- → What makes the coating extra crispy?
Panko breadcrumbs create a lighter, airier crunch compared to regular breadcrumbs. The combination with Asiago cheese and a light olive oil drizzle before baking ensures maximum crispiness while the asparagus stays tender inside.
- → Can I prepare these ahead of time?
Yes, coat the spears up to 4 hours in advance and refrigerate on the prepared baking sheet. Bake just before serving for the crispiest results. The coating holds up well when chilled.
- → What dipping sauces pair best?
Lemon-garlic yogurt sauce complements the Asiago beautifully. Aioli adds richness, while marinara provides a acidic contrast. A simple lemon wedge squeeze also enhances the flavors.
- → How do I know when they're done?
The coating should be golden brown and the asparagus tender when pierced with a fork. Baking times vary: thin spears take 8-10 minutes, medium 10-12 minutes, and thick 12-14 minutes at 425°F.
- → Can I make this gluten-free?
Substitute all-purpose flour with gluten-free flour blend and use gluten-free panko breadcrumbs. The texture remains crispy, and the coating adheres just as well with these alternatives.
- → What size asparagus works best?
Medium to thick spears hold up better during baking and provide a satisfying contrast between the tender vegetable and crunchy coating. Thin spears may become too soft before the crust browns properly.