 Pin This
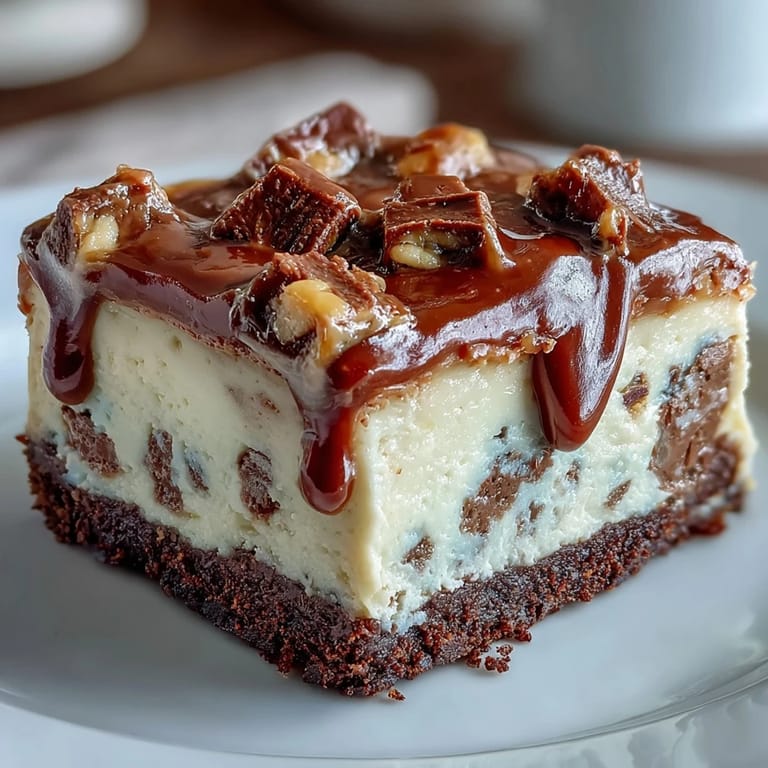
 My neighbor Sarah knocked on my door one Tuesday evening with a desperate look—she'd volunteered to bring dessert to her office party and forgotten until that morning. We had cream cheese, peanut butter, and half a bag of peanut butter cups lurking in her pantry, so we decided to throw together these cheesecake bars on the spot. Twenty minutes later, the aroma of chocolate cookie crust and baking cream cheese had us both leaning against the counter in disbelief that something this decadent could come together so quickly. Those bars disappeared before the party was even half over, and Sarah's been making them ever since.
I brought these to a family dinner last fall when my brother insisted he wanted something homemade but nothing too complicated. My mom took one bite and immediately asked for the recipe, then spent the entire meal plotting ways to make them for her book club. By the end of the night, my sister had already texted me asking if I could make them for her daughter's birthday party next month. That's when I realized these bars weren't just dessert—they were the kind of thing that makes people feel cared for.
Ingredients
- Chocolate cookie crumbs (1 1/2 cups): Oreos work perfectly, but remove the cream filling first so the crust stays crisp and doesn't get gummy during baking.
- Unsalted butter, melted (1/4 cup): This binds the crust together and helps it toast slightly in the oven for that deeper flavor.
- Granulated sugar for crust (2 tbsp): Adds a subtle sweetness that keeps the crust from tasting too cookie-forward.
- Cream cheese, softened (16 oz): Let it sit on the counter for at least 30 minutes so it blends smoothly without lumps.
- Granulated sugar for filling (2/3 cup): Sweetness and texture come together here; don't skip the beating step or you'll have a dense, heavy filling.
- Large eggs at room temperature (2): Cold eggs don't incorporate as evenly and can create pockets of undercooked filling.
- Sour cream (1/2 cup): This adds tanginess that cuts through the richness and keeps the bars moist during storage.
- Creamy peanut butter (1/2 cup): The foundation of the flavor—use a good quality peanut butter you actually enjoy eating straight from the jar.
- Vanilla extract (1 tsp): A small amount that rounds out the flavors without making anything taste like vanilla cake.
- Mini peanut butter cups, chopped (1 1/2 cups): Buy them already chopped or chop them yourself with a sharp knife; they distribute better when pieces are roughly the same size.
- Semisweet chocolate chips (1/2 cup, optional): A garnish that adds visual appeal and an extra hit of chocolate for those who want it.
- Creamy peanut butter for drizzling (2 tbsp, melted): Warm it gently so it drizzles smoothly without breaking into separated pools of oil.
Tired of Takeout? 🥡
Get 10 meals you can make faster than delivery arrives. Seriously.
One email. No spam. Unsubscribe anytime.
Instructions
- Heat and line your pan:
- Preheat to 350°F and line your 9x9-inch pan with parchment paper, leaving an overhang on two sides so you can lift the entire batch out later. This is the one step that saves you from hacking away with a knife to get the first piece out.
- Build the crust:
- Combine cookie crumbs, melted butter, and sugar in a bowl, mixing until it looks like damp sand. Press it firmly into the pan—use the bottom of a measuring cup to get it compact and even, then bake for 8 minutes until it sets.
- Prepare the filling base:
- Beat softened cream cheese with sugar until completely smooth, about 2 minutes, scraping the bowl down halfway through. You're aiming for a texture that's pale and fluffy, not dense or grainy.
- Incorporate the eggs gently:
- Add eggs one at a time, beating just until each one disappears into the mixture before adding the next. Over-beating at this stage incorporates air bubbles that create cracks on top during baking.
- Finish the filling:
- Stir in sour cream, peanut butter, and vanilla until the mixture is uniform and smooth, with no streaks of peanut butter visible. This is a good place to pause and fold in 1 cup of the chopped peanut butter cups.
- Assemble and top:
- Pour the filling over the cooled crust and spread it level, then scatter the remaining 1/2 cup of chopped peanut butter cups over the top. Some will sink slightly into the filling, which is exactly what you want.
- Bake with precision:
- Bake for 25–28 minutes; the center should jiggle just slightly when you gently shake the pan, like the surface of still water before someone drops a stone. Overbaking creates a dense, cracked top; underbaking means a filling that's too soft when chilled.
- Cool thoroughly:
- Let the bars cool at room temperature for at least an hour, then refrigerate for 2 hours minimum until they're completely firm. This time in the fridge is when the flavors meld and the texture becomes perfect for slicing.
- Finish and serve:
- Drizzle with melted peanut butter and scatter chocolate chips over the top just before serving. Use a sharp, hot knife dipped in warm water and wiped clean between cuts for clean edges.
 Pin This
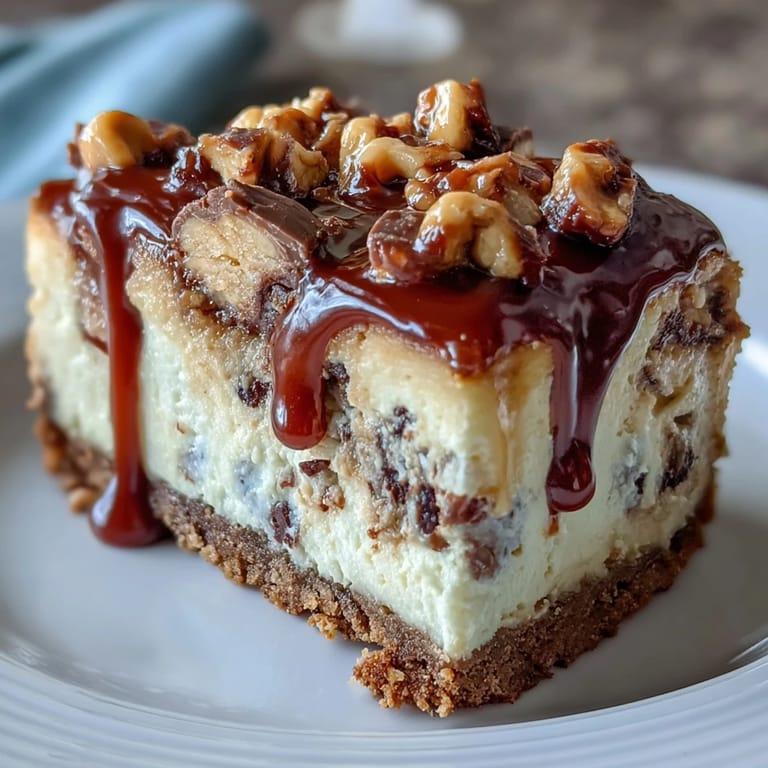
 Last month, my coworker brought these bars to share after I'd mentioned them in passing during a conversation about weekend baking. Watching people's faces light up when they tasted the combination of smooth cheesecake, crunchy peanut butter cups, and that fudgy cookie crust made me understand why comfort food matters—it's not about the ingredients, it's about the moment of genuine pleasure it creates.
Storage and Make-Ahead Tips
These bars are actually better on day two when the flavors have melded and the texture is perfectly firm. Store them in an airtight container in the refrigerator for up to 5 days, and they'll hold their shape beautifully. I've found that wrapping individual bars in parchment paper before storing them prevents them from sticking together and makes grabbing one on a busy morning feel like finding a treat you forgot you had.
Variations and Substitutions
The beauty of these bars is how forgiving they are to customization. If you want a crunchier base, add 1/4 cup of finely chopped roasted peanuts to the crust mixture for texture that stays crisp throughout baking. Almond butter swaps in beautifully if you're avoiding peanuts, though you might want to reduce it slightly since it has a thinner consistency. Some people press whole peanut butter cups into the filling instead of chopping them, which creates surprise pockets of chocolate and peanut butter when you slice.
Pairing and Serving Suggestions
Serve these chilled with cold milk or coffee—the richness of the bars balances perfectly with something simple to drink. These bars walk the line between fancy enough for a dinner party and casual enough for an after-school snack, which means they work for almost any occasion.
- A tall glass of cold milk cuts through the richness and feels nostalgic without trying too hard.
- Light-bodied coffee or espresso stands up to the chocolate and peanut butter without overwhelming them.
- Pair with fresh berries on the side if you want to add brightness, though honestly they don't need it.
 Pin This
 These bars have become my go-to when I need something that feels special without requiring hours of work. They're the kind of recipe that reminds you why baking matters—not because it's difficult, but because it transforms a few simple ingredients into something that brings people together.
Recipe FAQs
- → What type of crust is used in these bars?
The crust is made from crushed chocolate cookies mixed with melted butter and sugar, baked briefly for a firm, crunchy base.
- → Can I substitute peanut butter with another nut butter?
Yes, almond butter can be used as a substitute, but be mindful of any allergies.
- → How do I achieve the swirled peanut butter effect?
The peanut butter is folded into the cheesecake filling and drizzled on top before adding chopped peanut butter cups, creating a marbled appearance.
- → What is the best way to store these bars?
Store bars in an airtight container in the refrigerator for up to 5 days to maintain freshness.
- → Are the bars suitable for vegetarian diets?
Yes, these bars contain no meat products and align with vegetarian dietary preferences.
- → Can I add extra crunch to the crust?
Adding finely chopped roasted peanuts to the crust mixture enhances the texture with additional crunch.